 Teleorthodontics for Patients
The Dental Monitoring Software is based on the principle that because patients all carry their smartphones they can update you on their orthodontic progress at any time without having to take time off work or school to come to your office. This is certainly true; however, smartphones already provide this capability without the need for additional software.
There is certainly still value in the 3D monitoring service offered by Dental Monitoring, but you can implement a simple means of photographic patient monitoring today at almost no cost by scheduling FaceTime appointments or by simply having patients send you updates using the camera on their phone. Today we are going to go step by step with how to build a simple remote monitoring system using Google Forms.
Implementing Remote Monitoring
Items Required:
- C-shaped cheek retractors (can be bought cheaply on Amazon)
- A GSuite account with Google Forms
- A designated treatment concierge to review submissions and contact patients
- Patients who own smartphones
Step 1: Record Example Photo Monitoring Videos
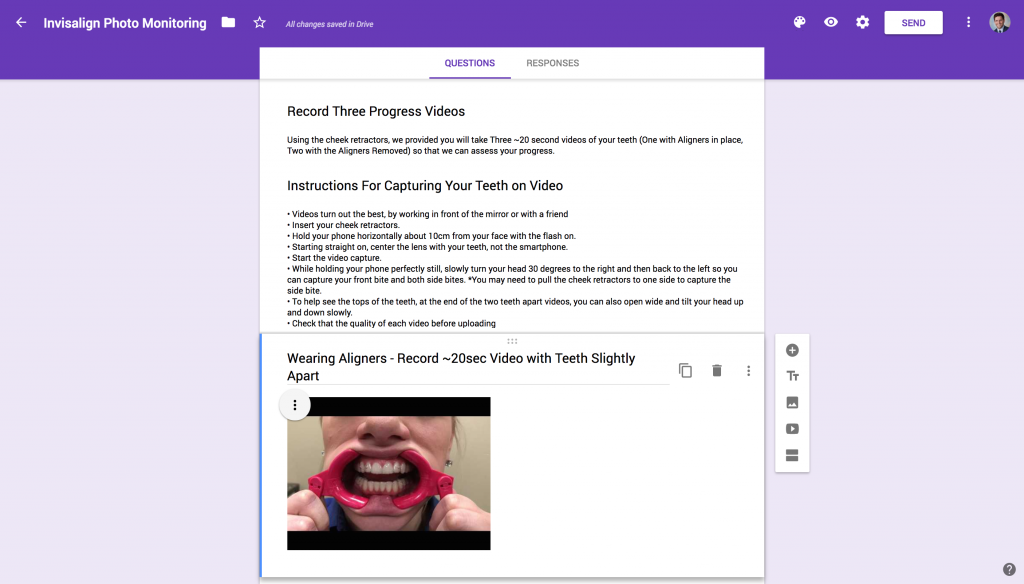
Record with a team member some example videos that demonstrate exactly treatment progress information should be captured on a smartphone. You should record 3 example videos: one with teeth apart and aligners in, one biting down with aligners removed, and one teeth apart and aligners out. Videos work better than individual photos because data capture is continuous and the video can then be paused during viewing. To capture the videos, the patient can either hold the camera in front of a mirror of have a friend help, and they simply turn their head while keeping the camera still. It helps to keep traction on the cheek retractors with a free hand to visualize the side bite more effectively.
Step 2: Upload Example Videos to GSuite Youtube Account
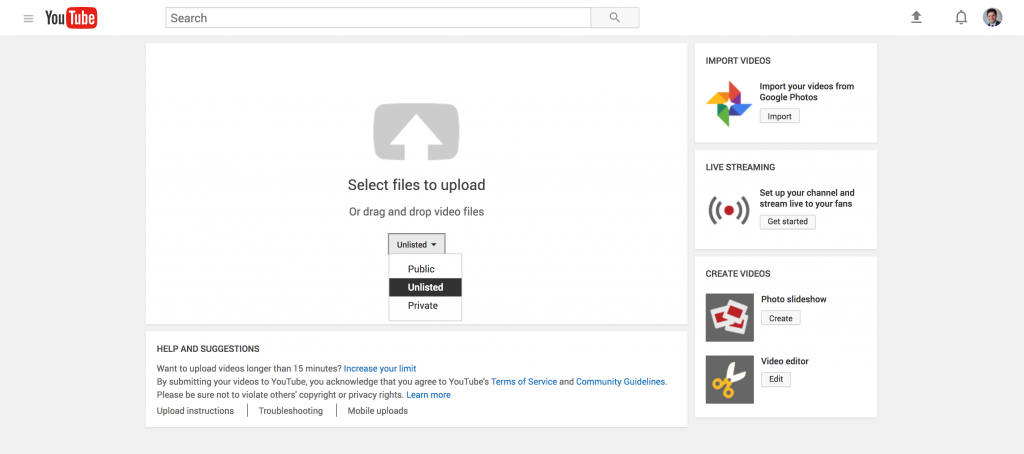
Once you have your 3 example videos recorded, you will then upload them to your office GSuite account as ‘unlisted’ videos. Unlisted means that the videos do not show in search results and only people with the link are capable of viewing them. You will embed these uploaded videos into your Google Form.
Step 3: Create Google Form
Google forms within GSuite are HIPAA compliant and very easy to use so they are ideal for these purposes. They also allow users to upload files; however, this is limited just to people within the office network at the current time. When they change this feature, it will become even simpler to use for these purposes.
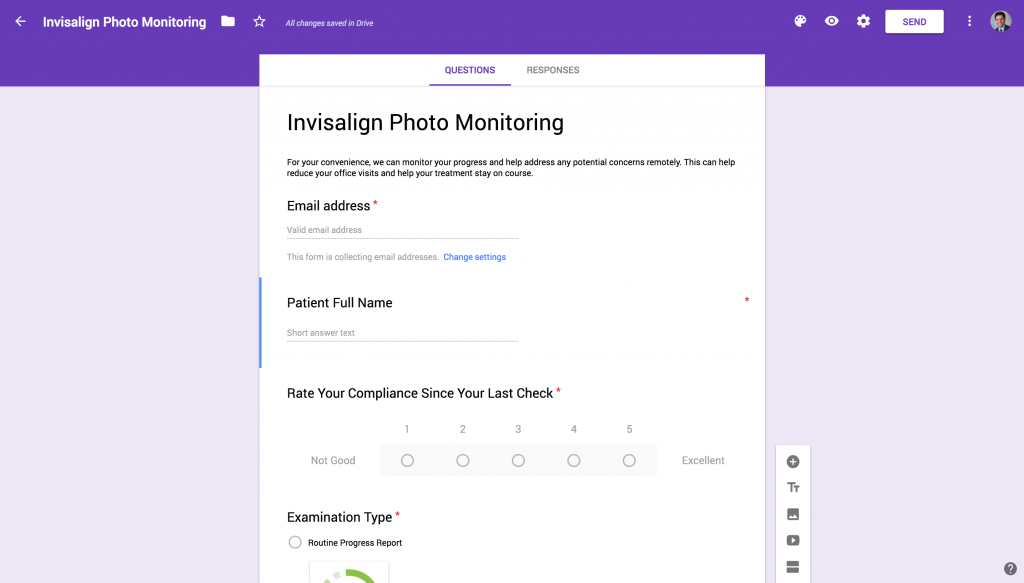
Start by filling in an appropriate title and description for the Photo Monitoring Google Form. In the settings require that an email address be entered and create a short answer section for the patient’s full name. This will allow you to link the survey results with the videos sent from the patient.
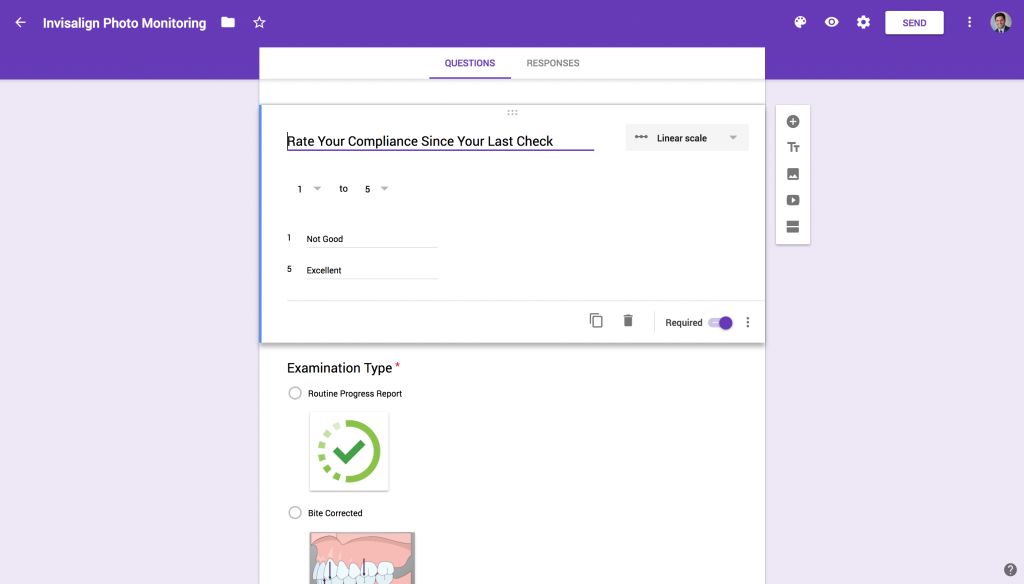
Next create a linear scale question allowing the patient to self-assess their level of compliance.
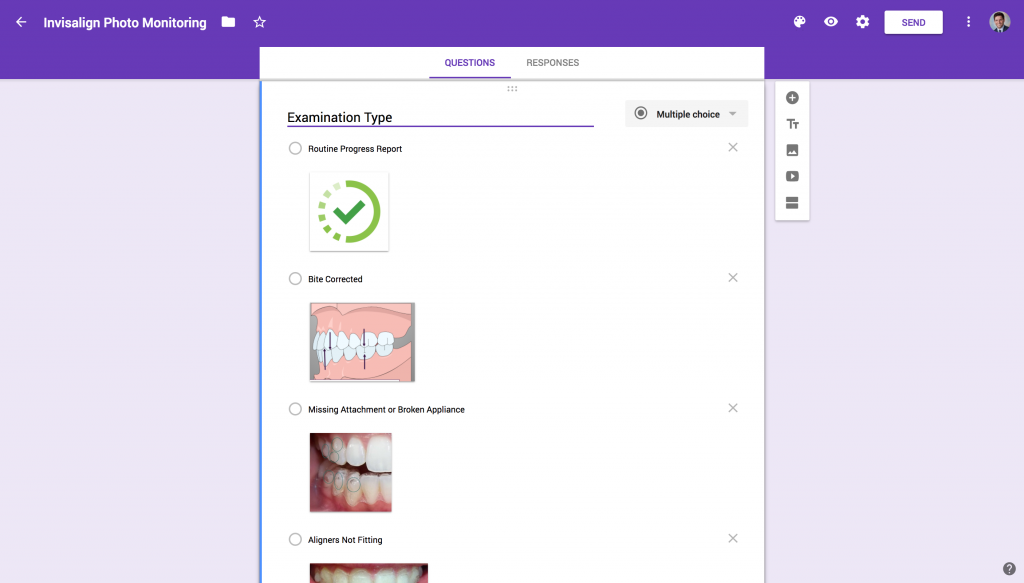
Add a multiple choice question to gather information about the patient’s progress (i.e. is this a routine progress update, did the bite correction with elastics get completed, is something broken or loose, etc.). You can also upload photos to accompany the choices to help guide the patient.
Next enter a text section with written instructions for the patient on how to capture the videos you require to perform remote monitoring of the patient. Below these instructions is where you will embed the videos that you previously uploaded, so your patients have an example of a good video capture.
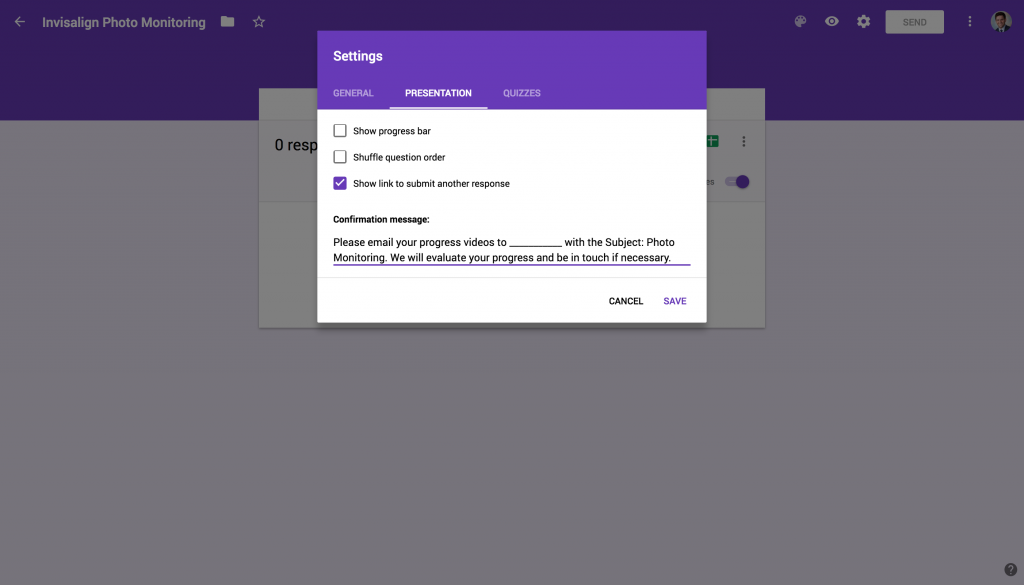
Currently patients will still have to email you the videos (cannot upload directly to the form if they are not on your office network), so you will need to provide an email address and instructions on where to send the photos following form submission. Under settings you can have a confirmation message appear after submission with this information. I also like to add a message at the end of the form to remind them.
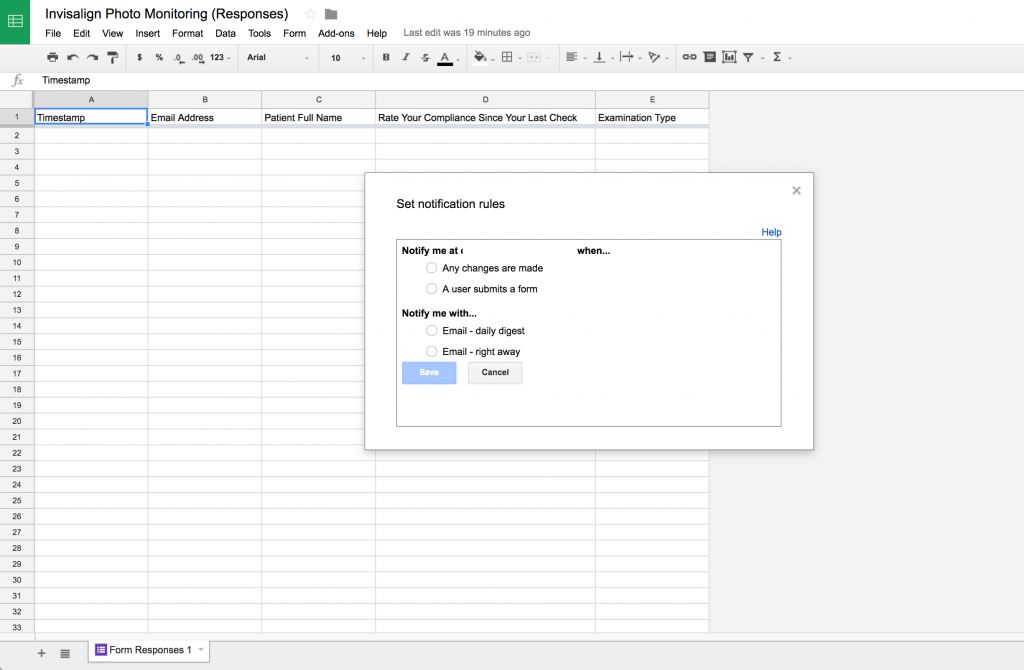
Link the form to a spreadsheet in GSuite and adjust your notifications settings so that your treatment concierge is notified about submissions and is able to contact the patients for follow up.
Once your form is complete you can use a short-link to share with patients on remote monitoring via email or text.
Step 4: Set Up Recurring Emails When Needed
Once your Google Forms are complete you are ready to implement your remote monitoring program to help patients who are traveling, patients in retention, or simply want the convenience of telemedicine. Setting up recurring emails within GSuite by installing any number of plugins from the Google Marketplace is simple and allows you to set it and forget it.
Remotely Monitoring Patients
This do-it-yourself teleorthodontics system is extremely useful for accommodating patients who might find it challenging to come to the office and certainly can make traditional orthodontic care more convenient for all patients. In addition to the simple photo monitoring, I highly recommend that everyone add an appointment code in their practice management software to accommodate FaceTime appointments. Facetime appointments work just like any other appliance check visit, but are simply done using a computer or smartphone in a private area to video conference with the patient.
Once you are up and running with these new appointment codes and systems, the following situations are ideal for offering more convenient options for your patients:
- Better communication regarding loose/broken appliances, wire pokes, and other patient concerns so that your team can schedule repair appointments more effectively
- Reduced appointments when using appliances that do not require doctor activation (Invisalign, elastic bite correction, jack screw expanders, habit appliances, etc.)
- Improved monitoring during retention
- Better coordination of care for patients who travel a distance or have challenging schedules
If you happen to be patient reading this article, know that orthodontists are generally a very forward thinking and flexible bunch so even if your doctor hasn’t presented this as an option, I am sure they would be more than happy to accommodate you. Hope you all found this post helpful!
Leave a Reply